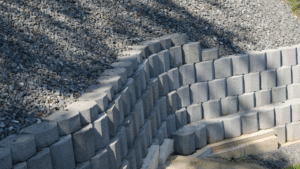
Building a retaining wall on a slope may seem challenging, but with the right approach, it can be a practical solution for preventing erosion, controlling water runoff, and enhancing your outdoor space. Whether you’re working with a gentle incline or a steep grade, proper planning and construction techniques are key to ensuring stability and longevity. This guide will take you through the essential steps to successfully build a retaining wall on a slope, from choosing the right materials to installation and maintenance.
Choosing the Right Materials
Popular Retaining Wall Materials
Selecting the right materials is crucial for building a strong, durable retaining wall that suits your landscape and budget. Each material has its own benefits, making it important to choose based on your specific needs and site conditions.
- Concrete blocks – Durable, easy to stack, and ideal for DIY projects.
- Natural stone – Offers a timeless, aesthetic appeal with long-lasting performance.
- Timber – A cost-effective option but requires regular maintenance to prevent decay.
- Modular retaining wall systems – Engineered for strength and easy installation, making them a versatile choice.
Factors to Consider When Selecting Materials
Choosing the right retaining wall (mortared wall) material depends on several key factors that impact durability, stability, and overall appearance. Understanding these considerations will help you make an informed decision for a long-lasting structure.
- Soil type and slope grade – Determines the level of reinforcement needed for stability.
- Climate conditions and water exposure – Affects material longevity and resistance to erosion.
- Budget and desired aesthetic – Balances cost-effectiveness with visual appeal and maintenance requirements.
Planning and Preparation
Site Assessment
Proper planning is essential for a stable and long-lasting retaining wall. A thorough site assessment helps identify potential challenges and ensures the structure meets safety and regulatory requirements.
- Measuring slope steepness and soil stability – Determines the wall’s height, reinforcement needs, and foundation depth.
- Identifying potential drainage challenges – Helps prevent water buildup and soil erosion behind the wall.
- Checking local building codes and permits – Ensures compliance with regulations and avoids costly adjustments later.
Tools & Materials Checklist
- Shovel – For digging and shaping the foundation.
- Tamper – Compacts the base material for stability.
- Level – Ensures even placement of blocks or stones.
- Measuring tape – Helps accurately mark and measure the site.
- Base material – Crushed gravel or sand for a solid foundation.
- Retaining wall blocks or stones – The main structural components of the wall.
- Drainage materials – Perforated pipes and gravel to prevent water buildup.
Step-by-Step Installation Process
Step 1: Excavation and Leveling
- Mark the wall’s layout using stakes and string for accuracy.
- Dig a trench deep enough for the base material (typically 4-6 inches deep for a 3-ft wall).
- Ensure the trench is wide enough to fit the blocks with extra space for drainage material.
- Check for level ground along the trench before proceeding.
Before any excavation, call 811 to check for underground utility lines—this federally mandated service helps prevent accidental damage and ensures a safe digging process.
Step 2: Installing a Solid Base
- For the first layer spread a 4-6 inch layer of crushed rock or sand at the bottom of the trench.
- Use a tamper (manual or powered) to compact the base material firmly.
- Lay a straight 2×4 across the base and check for level with a long level.
- Adjust as needed to ensure a completely flat and even base
Step 3: Placing and Securing Wall Blocks
- Start at one end and place the first block firmly on the base.
- Use a rubber mallet to tap the block into position and check for level in all directions.
- Continue laying the first row, ensuring each block is level and tightly fitted.
- For the second row, start with a half block to stagger joints for added strength.
- If necessary, cut blocks using a masonry saw or chisel to maintain the staggered pattern.
- For walls over 3 feet, consider using adhesive or interlocking block systems for added stability.
Step 4: Proper Drainage Solutions
- Lay a perforated drainage pipe at the base, directing water away from the wall.
- Fill the space behind the first row of blocks with 8-12 inches of crushed gravel.
- Continue adding gravel as you build up the wall, compacting it periodically to prevent settling.
Step 5: Backfilling and Compacting
- As you build each course, backfill behind the wall with gravel and compact it.
- Maintain a slight slope away from the wall to improve drainage.
- Avoid using soil directly behind the wall as it settles over time and may cause shifting.
Step 6: Finishing Touches for Stability and Aesthetics
- Place capstones on top using wall construction adhesive for a polished and secure finish.
- Fill any gaps with gravel or sand to lock blocks in place.
- Landscape around the wall to prevent erosion and improve the overall look.
Common Mistakes to Avoid
Avoiding key mistakes ensures a strong, long-lasting retaining wall. Poor drainage can cause water buildup, increasing pressure and leading to failure—installing perforated pipes and gravel helps prevent this. Lack of reinforcement for taller walls may result in leaning or collapse; walls over three feet often need geogrid or structural engineered support. Inadequate base preparation leads to shifting over time—compacting a solid gravel base prevents uneven settling. Proper planning and construction help avoid costly repairs and ensure durability.
Maintenance Tips for Long-Lasting Performance
Proper maintenance ensures your retaining wall stays strong and functional for years. Regular upkeep helps prevent structural issues and extends its lifespan.
- Inspect for shifting or cracking – Check periodically for signs of movement or damage and address issues early.
- Clean and seal (if applicable) – Remove dirt and debris, and apply a sealant to protect against weathering.
- Check for drainage blockages – Ensure perforated drainpipes and gravel remain clear to prevent water buildup and pressure.
DIY vs. Professional Installation Considerations
When DIY is Feasible
If you’re wondering how to build a small retaining wall on a slope, DIY installation is often feasible for walls under three feet or installing a straight wall, especially when using modular blocks designed for easy stacking. These materials require minimal tools and expertise, making them manageable for homeowners with basic construction skills. However, proper site preparation and drainage are still essential to ensure long-term stability.
When to Hire a Professional
For steep slopes, tall retaining walls, or projects with complex drainage needs, professional expertise is essential. Improper installation can lead to structural failure, erosion, or water damage. Sta-Built ensures your retaining wall design is built to last, handling everything from site preparation to drainage solutions while ensuring compliance with local regulations.
Conclusion
Building a retaining wall on a slope requires careful planning, quality materials, and expert installation. A solid base, proper drainage, and reinforcement ensure long-term durability. While DIY is possible for small walls, complex projects need professional expertise. Sta-Built Construction provides high-quality retaining walls with expert craftsmanship and long-term support, ensuring a lasting, reliable solution. Contact us today.
Related Article: Retaining Wall Anchors


