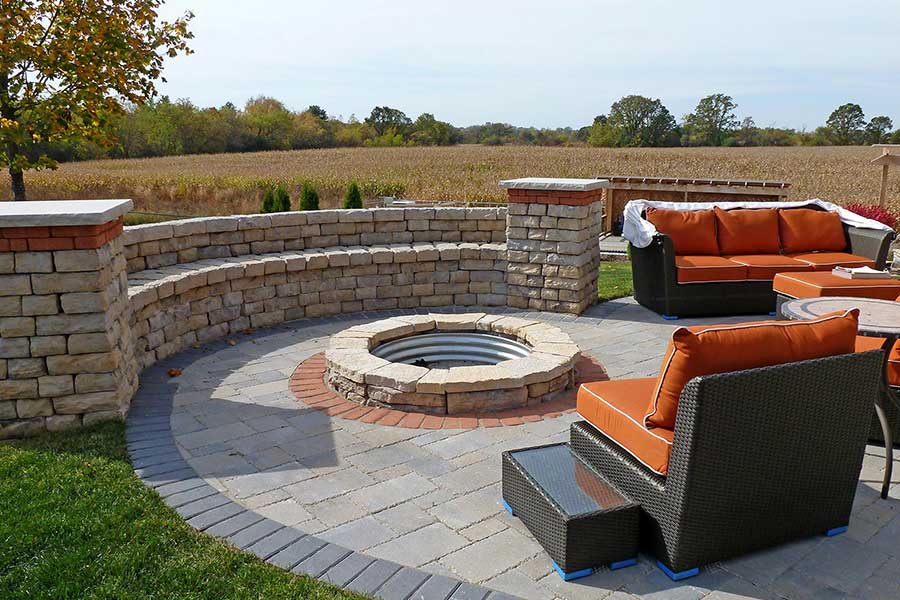
Having some extra spaces around your property to sit, relax, chill, and sip something pleasant is a great way to add charm and value to your home. While quite a few options exist ready-made, one way to add more outdoor seating to your backyard is to construct an outdoor seating wall.
How does one do this, and what steps are needed? Let’s break down this project, and help you get started!
About Seating Walls
A seating wall combines the aesthetics and building materials of a traditional, short wall with the practicality of a place for hosts or guests to sit down, frequently encircling a fire pit, patio, or other social outdoor space. They are simple, beautiful, and can be made from a variety of materials and colored stones or bricks, making them blend into any backyard.


Getting Started
The first step to setting up your new seating wall is to map out, generally using spray paint, the curvature that you want your seating wall to follow. Decide how long it will be, and how tight the curvature of the wall should be for the space it’s encircling. Next, dig out a shallow and even trench of about six inches in depth and one foot in width, and fill this trench with paver base for added stability. Once your paver base is filled in and compacted down, you can begin the assembly of your seating wall.
Seating Wall Assembly
Assembly of your seating wall can be done with just a couple of people working together, and requires minimal setup. Assemble your pavers, bricks, or stones along the curve of your wall base. Trapezoidal pavers exist to help form a curvature, but you may need to cut square or rectangular pavers for a better fit.
Starting with the second layer of pavers, pile and arrange them manually so that they fit neatly with the arch of the layer below, and then cement them in place using a construction adhesive. For added strength and stability, make sure that you overlap the edges of each paver in every new row you form. Again, a stone saw may come in handy for this!
Finishing Touches
One you’ve build up your wall to its desired height, go ahead and cap the final paver layer with large rectangular stones at an angle that’ll give your wall a bit of a seat to perch on, as well as add beauty and charm to your seating wall. Make sure to cement them down with adhesive, as well, and give your new seating wall at least 24 hours to cure.
After your seating wall has cured, you’ll be ready to enjoy added space around your patio or fire pit! You’ll have a beautiful, natural-looking, and inviting new feature in your backyard entertaining space that will invite friends and family to gather around, talk, share, and enjoy everything the summer has to offer. Even better, you’ll have built it yourself, and you can look back with pride on a project and element that adds beauty, value, charm, and uniqueness to your backyard. Enjoy!
Want to Hire an Expert Installer?
If you decide you want to hire an expert to install your seating wall in Western Washington, contact Sta-Built Construction for your seating wall installation.
Recommended Article: Small Backyard Turf Ideas

